1.Indications
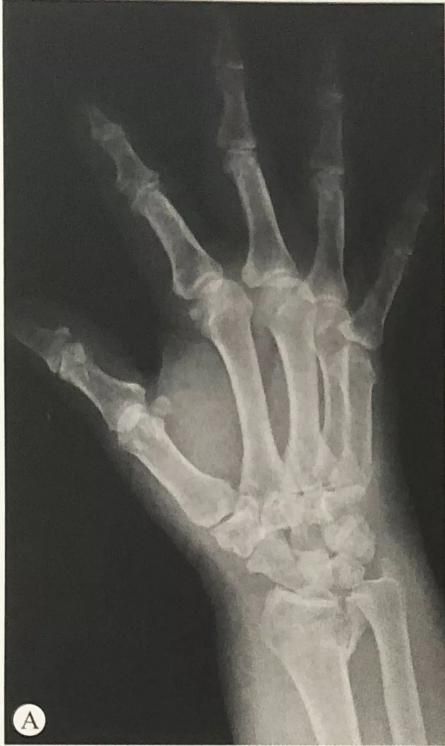
1).Severe comminuted fractures have obvious displacement, and the articular surface of the distal radius is destroyed.
2).The manual reduction failed or the external fixation failed to maintain the reduction.
3).Old fractures.
4).Fracture malunion or nonunion. bone present at home and abroad
2.Contraindications
Elderly patients who are not suitable for surgery.
3. External fixation surgical technique
1. Cross-articular external fixator to fix distal radius fractures
Position and preoperative preparation:
·Brachial plexus anesthesia
·Supine position with the affected limb flat on the see-through bracket next to the bed
·Apply a tourniquet to 1/3 of the upper arm
·Perspective surveillance

Surgical Technique
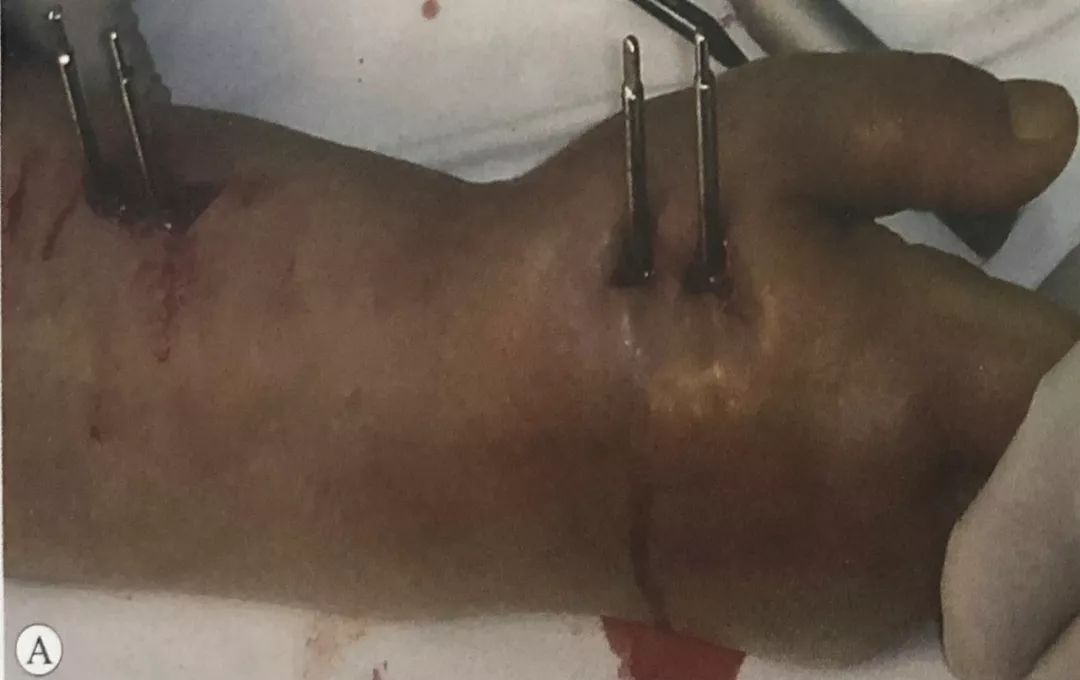
Metacarpal Screw Insertion:
The first screw is located at the base of the second metacarpal bone. A skin incision is made between the extensor tendon of the index finger and the dorsal interosseous muscle of the first bone. The soft tissue is gently separated with surgical forceps. The sleeve protects the soft tissue, and a 3mm Schanz screw is inserted. Screws
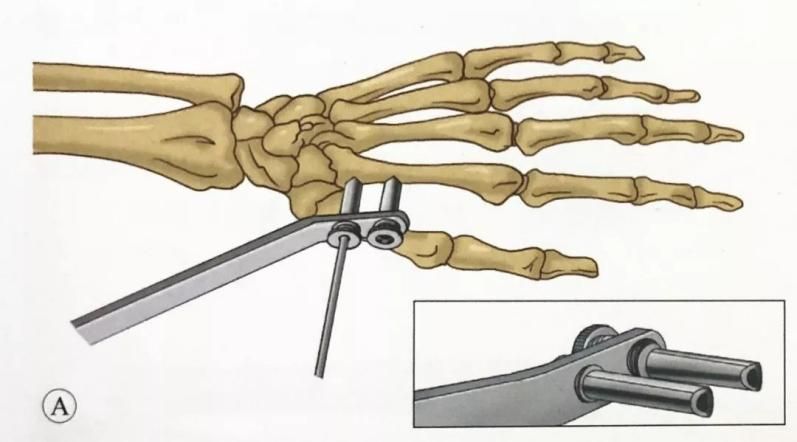
The direction of the screw is 45° to the plane of the palm, or it can be parallel to the plane of the palm.
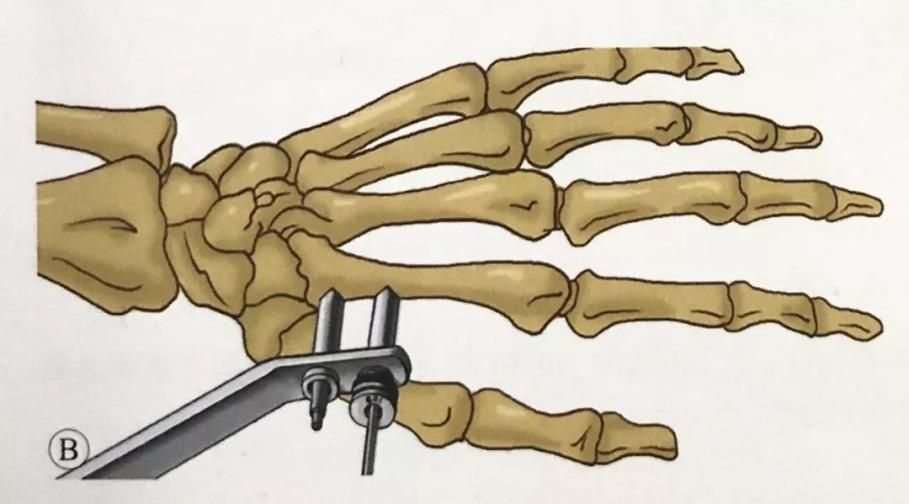
Use the guide to select the position of the second screw. A second 3mm screw was driven into the second metacarpal.
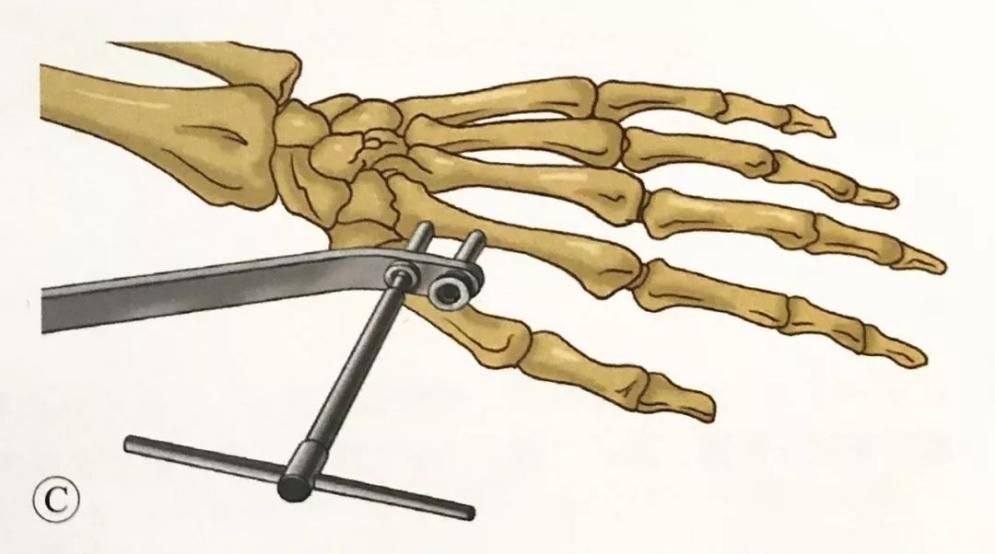
The diameter of the metacarpal fixation pin should not exceed 3mm. The fixation pin is located in the proximal 1/3. For patients with osteoporosis, the most proximal screw can penetrate three layers of cortex (the second metacarpal bone and the half cortex of the third metacarpal bone). In this way, the screw The long fixing arm and large fixing torque increase the stability of the fixing pin.
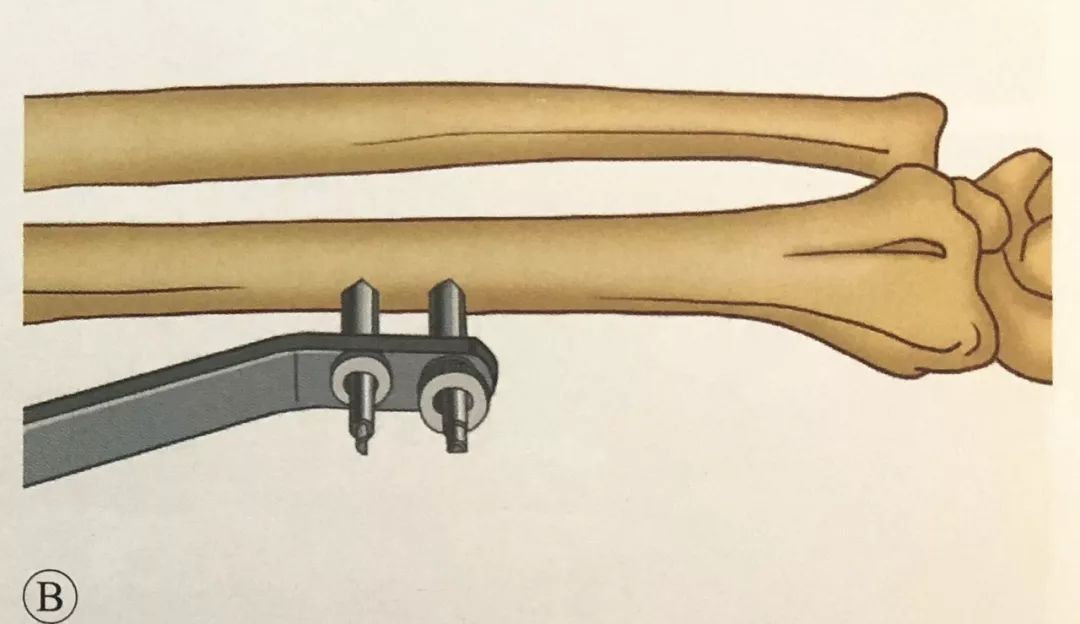
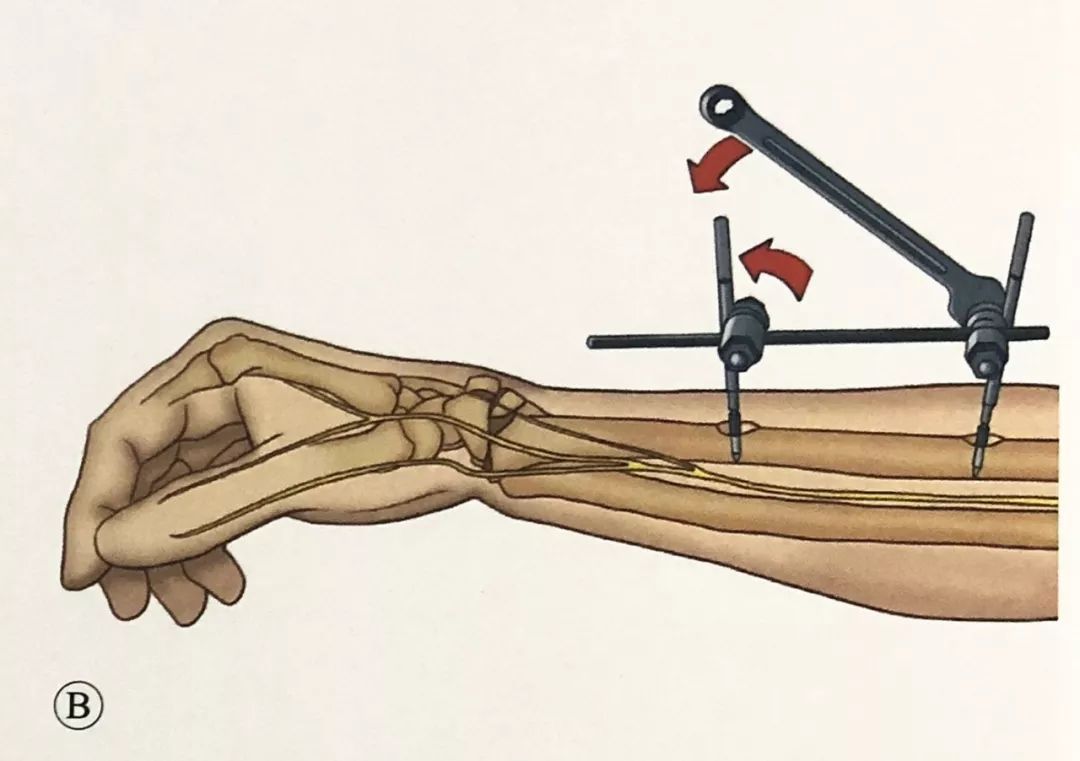
Placement of radial screws:
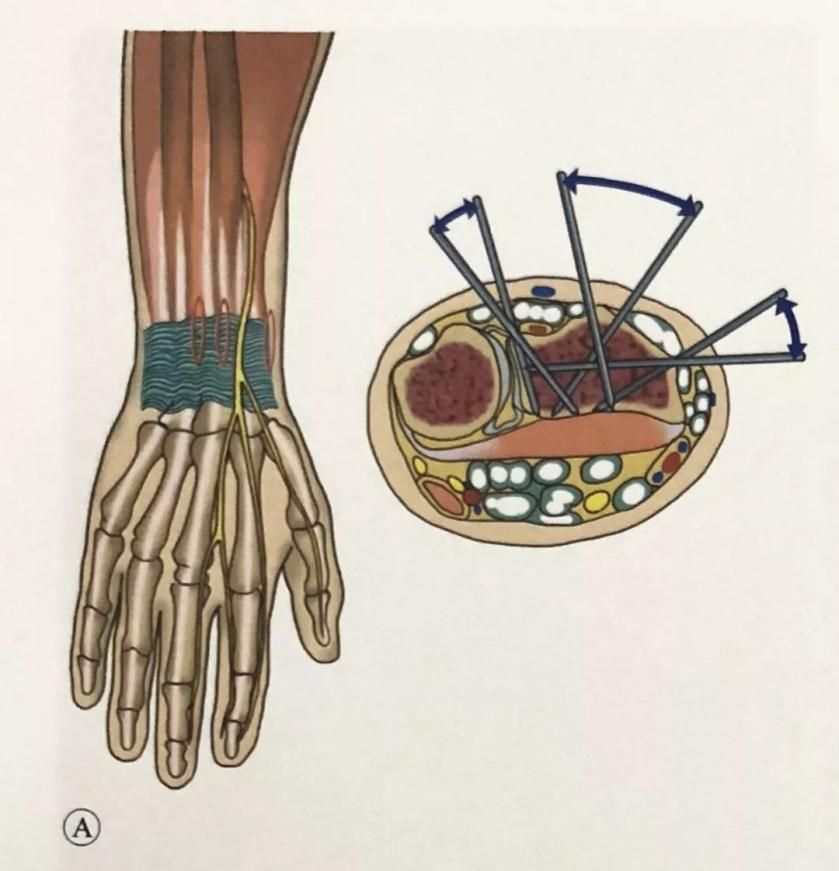
Make a skin incision on the lateral edge of the radius, between the brachioradialis muscle and the extensor carpi radialis muscle, 3cm above the proximal end of the fracture line and about 10cm proximal to the wrist joint, and use a hemostat to bluntly separate the subcutaneous tissue to the bone surface. Care is taken to protect the superficial branches of the radial nerve that course in this area.
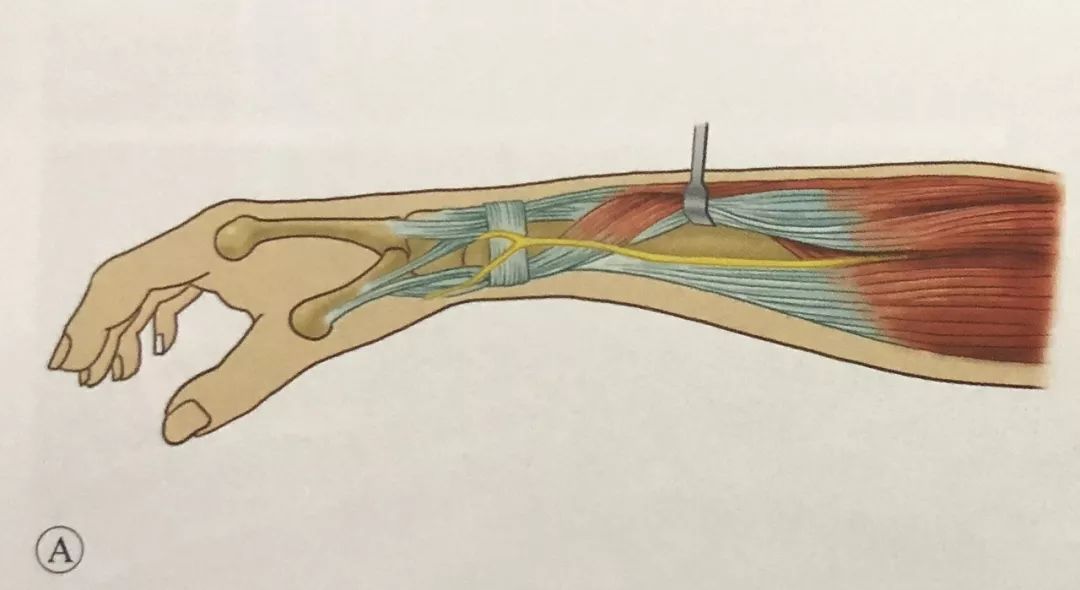
On the same plane as the metacarpal screws, two 3mm Schanz screws were placed under the guidance of the sleeve protection soft tissue guide
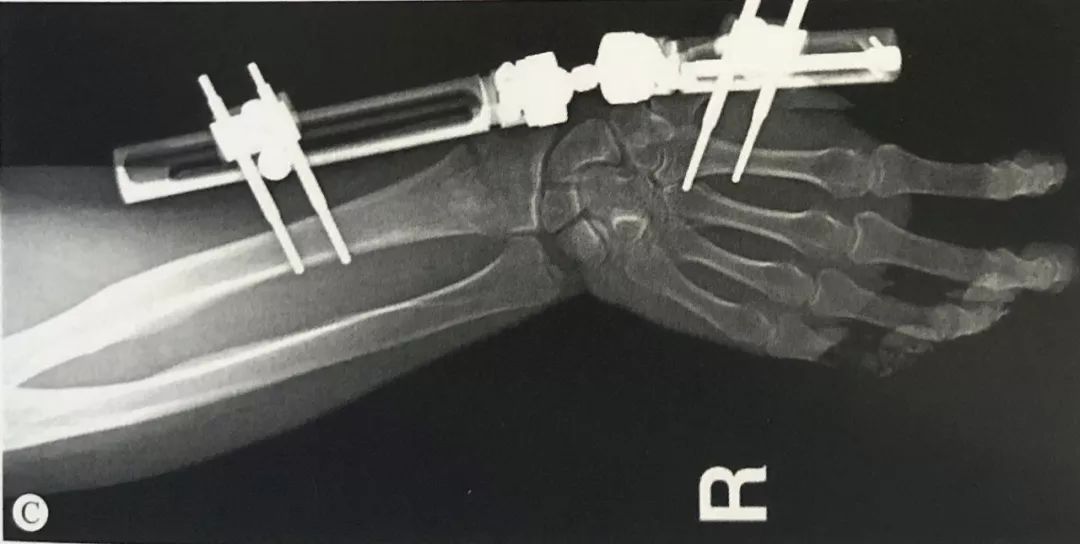
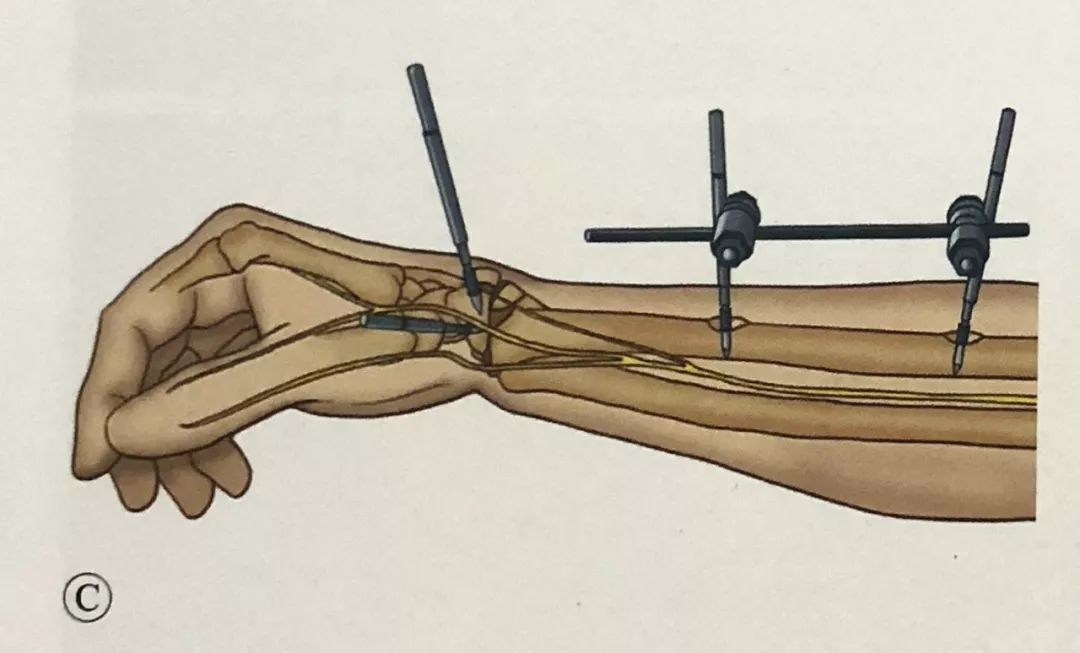
·.Fracture reduction and fixation:
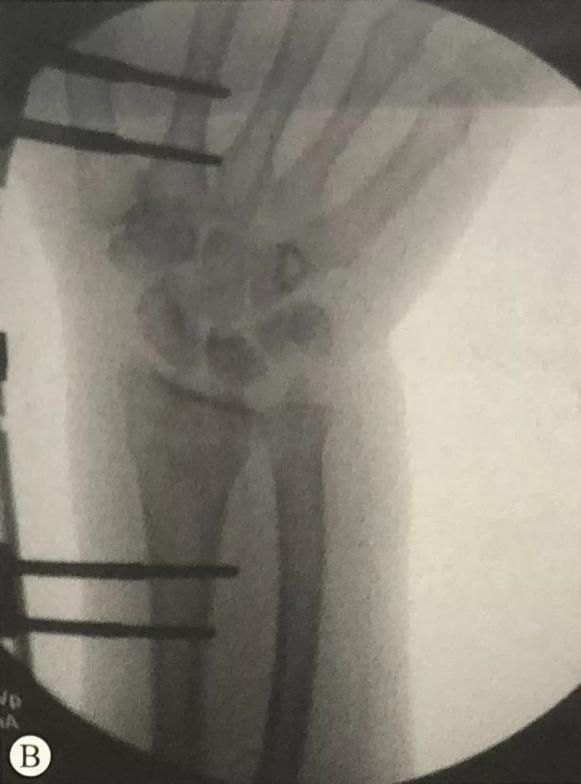
·.Manual traction reduction and C-arm fluoroscopy to check the reduction of the fracture.
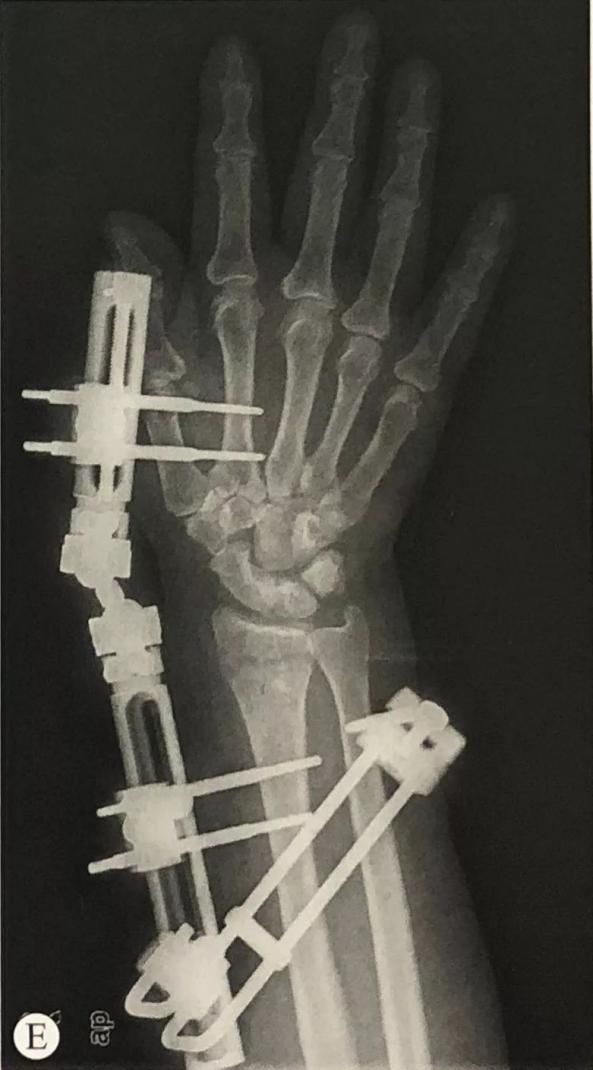
·.External fixation across the wrist joint makes it difficult to completely restore the palmar inclination angle, so it can be combined with Kapandji pins to assist in reduction and fixation.
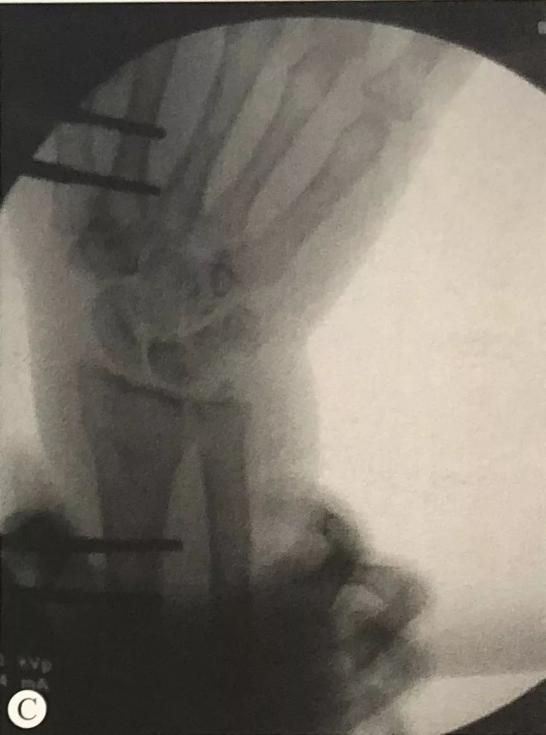
·.For patients with radial styloid fractures, radial styloid Kirschner wire fixation can be used.
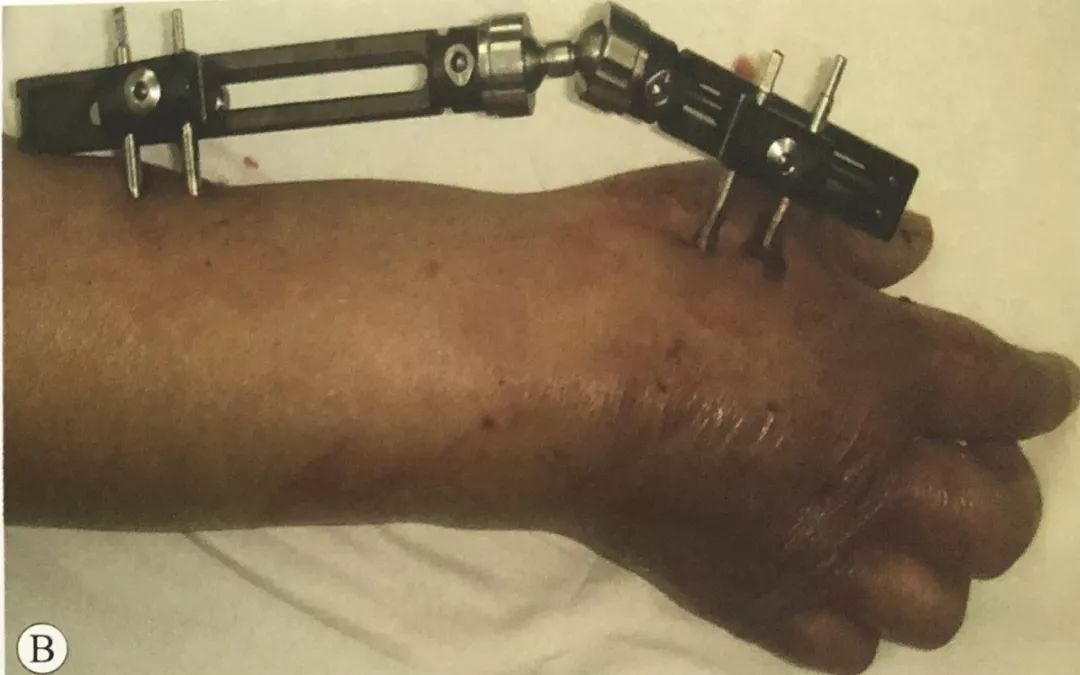
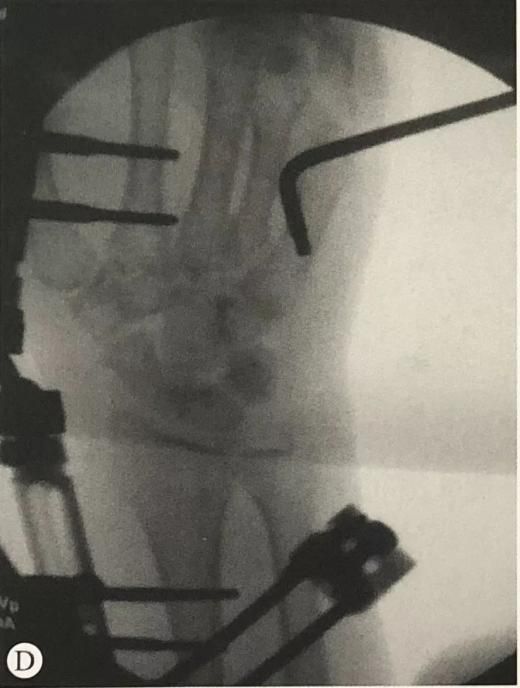
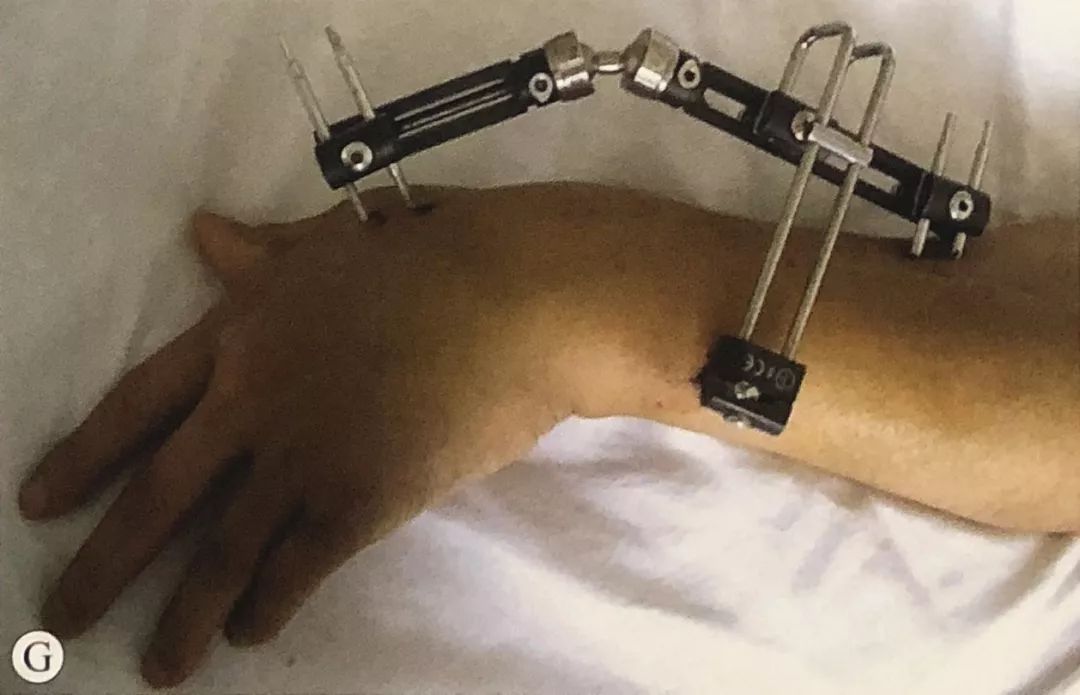
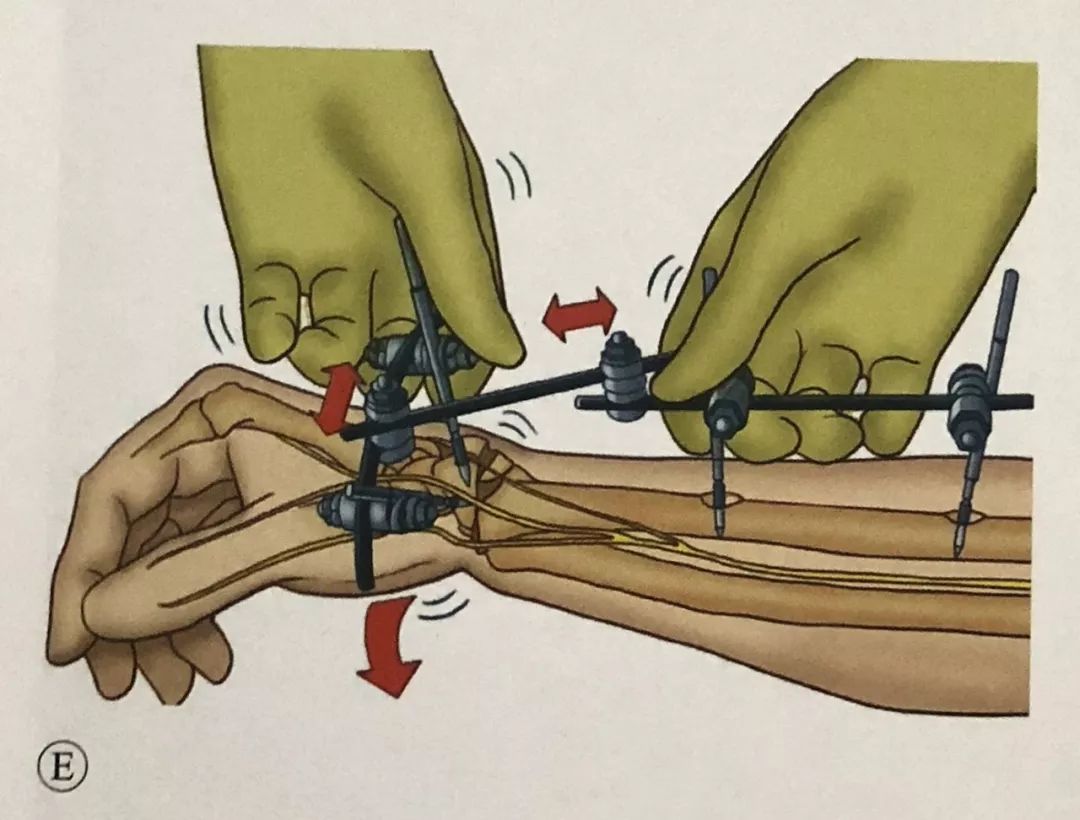
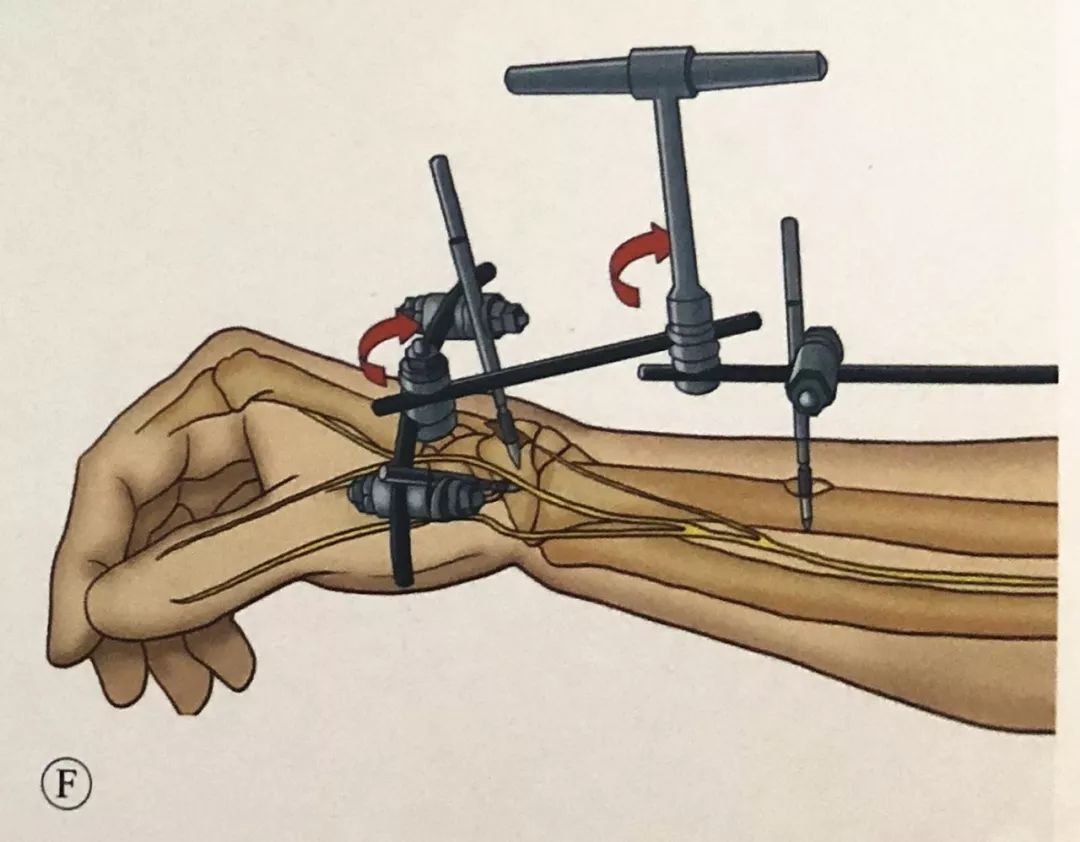
·.While maintaining the reduction, connect the external fixator and place the rotation center of the external fixator on the same axis as the rotation center of the wrist joint.
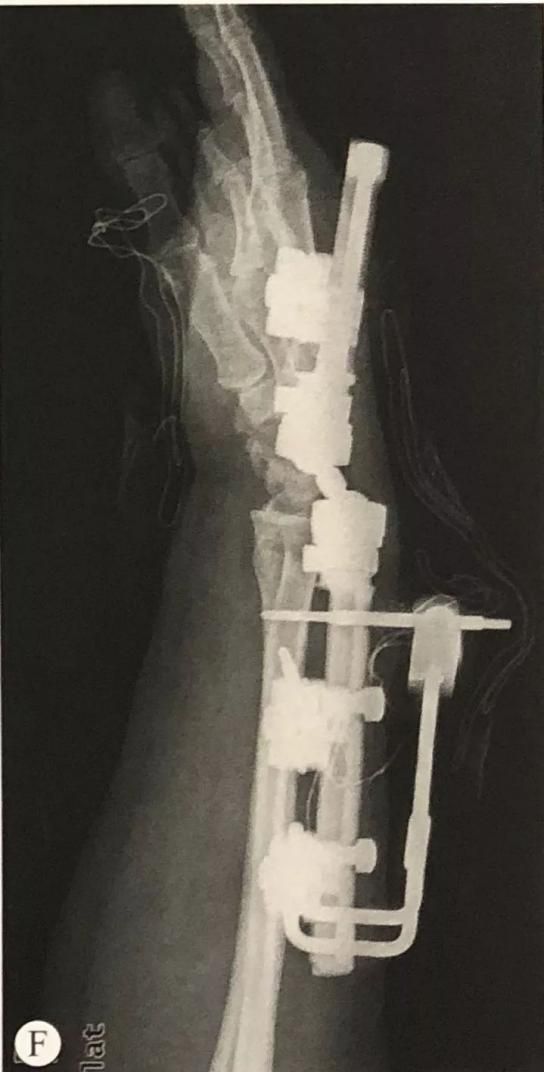
·.Anteroposterior and lateral fluoroscopy, check whether the radius length, palmar inclination angle and ulnar deviation angle are restored, and adjust the fixation angle until the fracture reduction is satisfactory.
·. Pay attention to the national traction of the external fixator, causing iatrogenic fractures at the metacarpal screws.
Distal radius fracture combined with distal radioulnar joint (DRUJ) separation:
·.Most DRUJs can be reduced spontaneously after reduction of the distal radius.
·.If the DRUJ is still separated after the distal radius is reduced, use manual compression reduction and use the lateral rod fixation of the external bracket.
·.Or use K-wires to penetrate the DRUJ in the neutral or slightly supinated position.
Fracture of distal radius combined with ulnar styloid fracture: Check the stability of the DRUJ in pronation, neutral and supination of the forearm. If instability exists, assisted fixation with Kirschner wires, repair of TFCC ligament, or tension band principle can be used for fixation Ulnar styloid process.
Avoid excessive pulling:
· Check whether the patient's fingers can perform complete flexion and extension movements without obvious tension; compare the radiolunate joint space and the midcarpal joint space.
·Check whether the skin at the nail channel is too tight. If it is too tight, make an appropriate incision to avoid infection.
·Encourage patients to move their fingers early, especially flexion and extension of the metacarpophalangeal joints of the fingers, flexion and extension of the thumb, and abduction.
2. Fixation of distal radius fractures with an external fixator that does not cross the joint:
Position and preoperative preparation: Same as before.
Surgical Techniques:
The safe areas for K-wire placement on the dorsal side of the distal radius are: on both sides of Lister's tubercle, on both sides of the extensor pollicis longus tendon, and between the extensor digitorum communis tendon and the extensor digiti minimi tendon.
In the same way, two Schanz screws were placed in the radial shaft and connected with a connecting rod.
Through the safety zone, two Schanz screws were inserted into the distal radius fracture fragment, one from the radial side and one from the dorsal side, with an angle of 60° to 90° to each other. The screw should hold the contralateral cortex, and it should be noted that the tip of the screw inserted on the radial side cannot pass through the sigmoid notch and enter the distal radioulnar joint.
Attach the Schanz screw at the distal radius with a curved link.

Use an intermediate connecting rod to connect the two broken parts, and be careful not to lock the chuck temporarily. With the help of the intermediate link, the distal fragment is reduced.
After reset, lock the chuck on the connecting rod to complete the final fixation.
The difference between non-span-joint external fixator and cross-joint external fixator:
Because multiple Schanz screws can be placed to complete the reduction and fixation of bone fragments, the surgical indications for non-joint external fixators are wider than those for cross-joint external fixators. In addition to extra-articular fractures, they can also be used for second to third fractures. Partial intra-articular fracture.
The cross-joint external fixator fixes the wrist joint and does not allow early functional exercise, while the non-cross-joint external fixator allows early postoperative wrist joint functional exercise.
Post time: Sep-12-2023